Showing posts with label Shannon Miller. Show all posts

Tuesday, July 30, 2013

July Book Blog: Sew Serendipity Skirt Sew-Along - Part 4

Hello, everyone! Welcome to the finale Week 4 of our July Sew Serendipity Skirt Sew-Along. We have been making the "Tailored Skirt" from Kay Whitt's book Sew Serendipity, so if you're just joining me, catch up by first reading Part 1, Part 2 and Part 3.


This week, all that was left was to finish up by adding the bottom hem on the skirt. It was super simple - a nice, relaxing time at the machine after 2 more intensive weeks of construction!


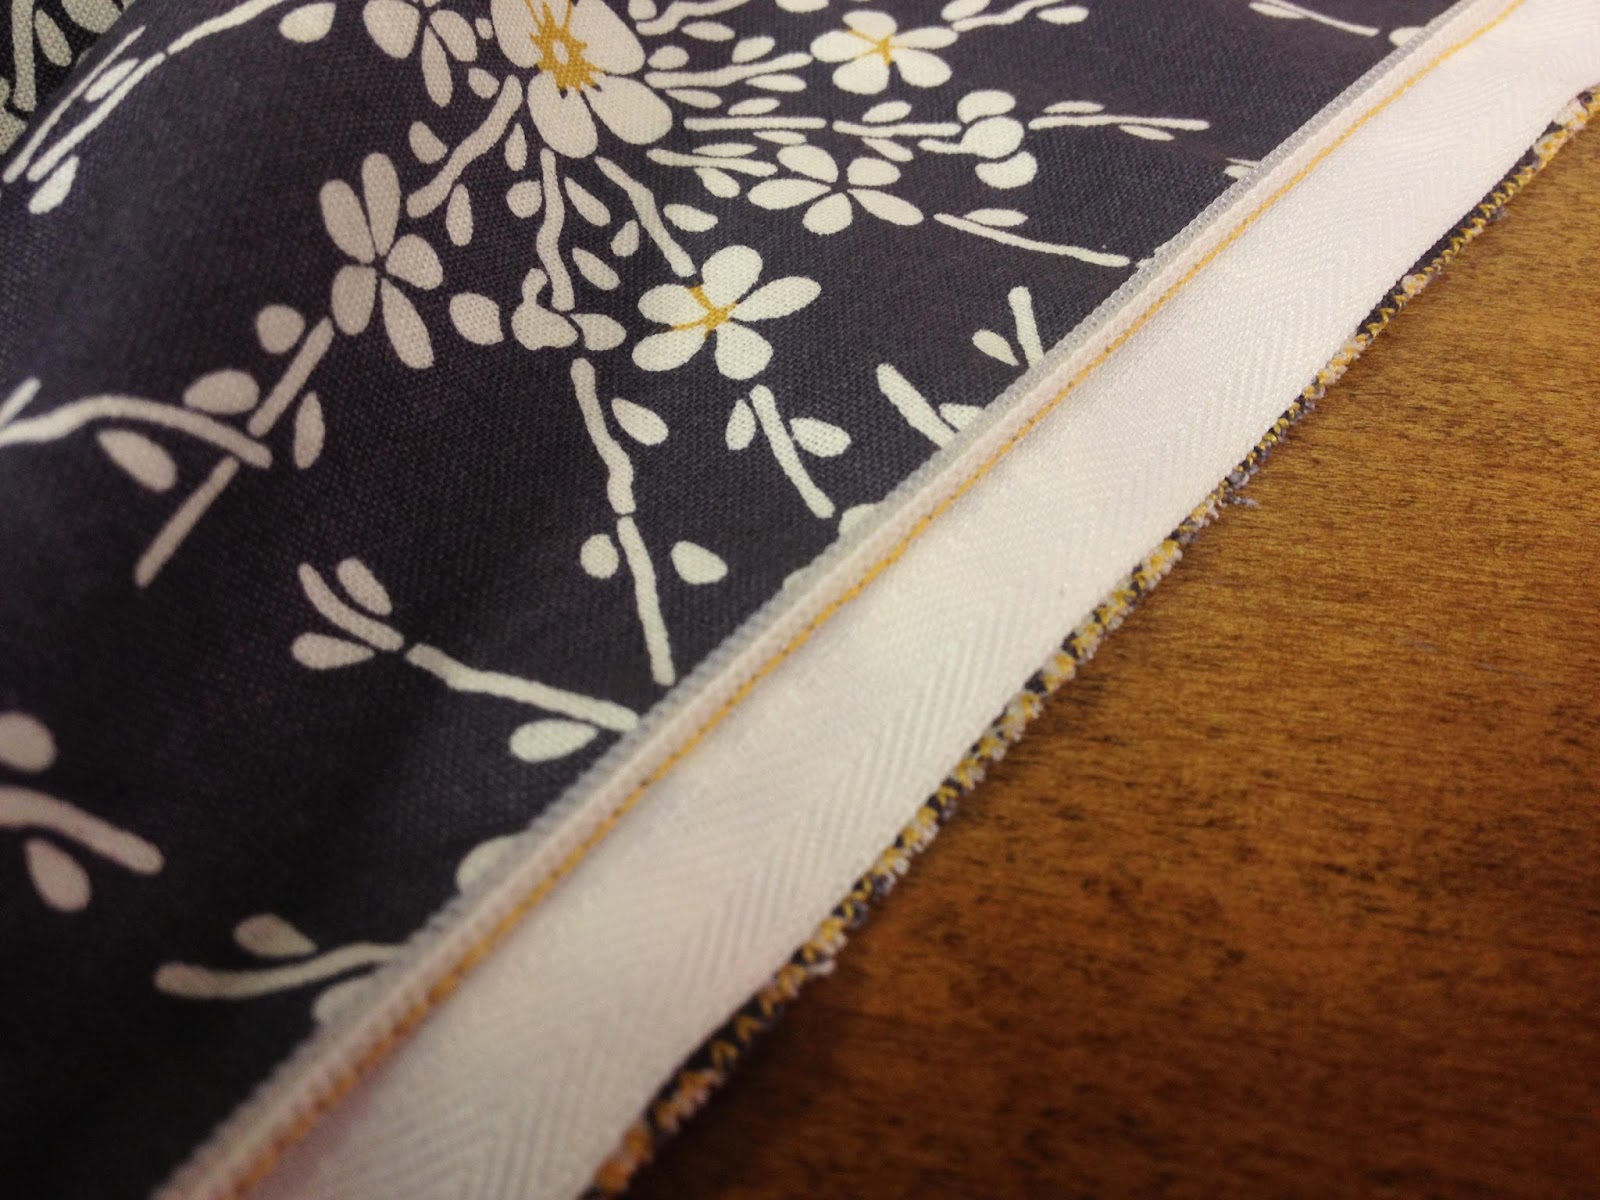
Again, I really love that I chose this golden yellow for my contrast stitching. It pops on top of the prints and really accents the seams. I am a little annoyed that my machine did some funky stitching on my very top line, but it's so minor you can't really tell - especially when worn.


Don't you love how a finished garment feels once all the details are in place? Here is my finished skirt pinned onto a mannequin - I had to draw it in quite a bit in the back to pin it, since the mannequin is skinny and I am, well, not. ;) I'll try to get a photo of myself in it soon and come back to update for you all.


I hope you had a great time sewing along with me! Be sure to share your finished skirts or adaptation ideas in the comments.

Tuesday, July 23, 2013

July Book Blog: Sew Serendipity Skirt Sew-Along - Part 3

Hello, everyone! Shannon again, back with Week 3 of our July Sew Serendipity Skirt Sew-Along. We are making the "Tailored Skirt" from Kay Whitt's book Sew Serendipity, so if you're just joining me, catch up by first reading Part 1 and Part 2.


When we left off last week, I had prepared my skirt panels, pockets and facings and was ready to stitch the skirt front and back together. Today, we'll complete steps 4 and 5 of the skirt construction - which seems simple enough, but this also includes referring to other parts of the book for "general construction" instructions on inserting the invisible zipper and adding the facings. Above, you can see where my front piece and two back pieces are all constructed, ready for my zipper!


To be perfectly honest, I have never inserted an invisible zipper before - but it actually went very smoothly! The zipper foot on the Viking machine I'm using made it really simple.


Here I am proudly showing off how neatly my zipper went in. ;-) I really did surprise myself - and will definitely not be shying away from invisible zippers anymore!


Once I got the zipper in, it was quick to finish up the top hem by applying the facings, understitching and then top- and edgestitching.


And that's it for this week! Are you sewing along with me? I would love to see what you're creating. Be sure to share in the comments, and join me again next week for the fourth and final installment of our sew-along. I'll be completing the skirt with a hem band and showing off the finished product!

Thursday, July 18, 2013

Store Your Sewing Needles in Style!

Embellished (left) and Embroidered Needlebook

When you spend as much time in your sewing room as we do, it's important to make a space where you enjoy spending your time. As in the creation of a beautiful garment, the magic is in the details. You'll never have to hunt for your needles again with this fun little needlebook designed by Jean Etheridge and our senior editor Shannon Miller. Made using wool felt and a coordinating cotton print, the design has endless opportunities for embellishment and includes a hidden back pocket that is perfect for at-hand access to a small ruler, seam ripper or seam gauge. It also fits nicely in a tote bag or suitcase!

Preparation: 1. Cut three rectangular pieces (one of print cotton, one of thin batting and one of wool felt) all the same size for the cover. The sample was cut 6 x 11 inches and will finish at approximately 5-1/2 x 10-1/2 inches before it is folded in thirds for the final book. The needle and pin book could be bigger or smaller as desired, however. 

2. Cut two rectangles 5-1/2 x 6 inches of wool felt for the inside pages. The pages will be folded in half before they are sewn into the book; the two rectangles will make four pages (5 inches tall x 3 inches wide) the needlebook. If you change the outside dimensions, you will want to adjust the page size as well.

3. Cut one piece of cotton 6 x 6 inches to make the pocket at the back of the book. Fold this piece in half, wrong sides together and press. 

4. Before assembling the book, consult the specific instructions below to prepare the cover for the book you are making.

Fill your book with needles and notions!

Embellished Needlebook: 1. First, fold the wool felt in approximate thirds. On the third that will become the cover, hand stitch desired embellishments. Similarly, fold one of the book pages in half, and using the front half, sew another embellishment on the bottom half of the page. Pick up only a few felt fibers while applying the embellishment so that the stitching does not show from the other side.

Embroidered Needlebook: 1. The embroidered needlebook cover is made in the same general fashion, but instead of embellishments, stitch the word "needles" on the cover. You could also personalize it with a name if you prefer! NOTE: The sample "needles" embroidery pattern is provided here.

2. On the front fold of one of the book pages, stitch an embroidery design of your choice. NOTE: The "spool and needle" embroidery pattern pictured on our sample can also be found on the above link with the "needles" pattern.

3. Using embroidery floss, sew the two pages together all of the way around with a buttonhole stitch. This step will conceal the back of the embroidery, and this version of the book will only have two pages, while the embellished version has four pages.

Assembly Instructions: 1. Place the folded cotton rectangle on the right side of the larger cotton rectangle at the right end. Baste (fig. 1). (In the embroidered version, the pocket is divided into two sections with a line of stitching.) 

Figure 1

2. Place the cotton rectangle (and the basted cotton pocket) on top of the batting rectangle; then place the large cotton rectangle face down on the wool felt rectangle. The pocket should be at the opposite end from the decorated wool felt front. Sew all of the way around, leaving a 2-inch opening for turning (fig. 2).

Figure 2

3. Turn the rectangles right side out. The batting will be enclosed between the layers. The cotton side is the inside, while the decorated wool felt will become the front of the book. The pocket should be on the right third inside of the book. Once the book is turned right sides out, close the 2-inch opening with hand stitching. 

4. Measure and mark the book in thirds (about 3 inches for each third). Place the felt needle pages 3 inches from the left side of the book. Machine stitch the pages from the top of the page to the bottom, backstitching at both ends. In the same way, machine stitch top to bottom about 3 inches from the right side (fig. 3). 

Figure 3

5. Fold needlebook together so that the front page shows when the book is opened. Fill with all your needles and notions!

For more sewing inspiration, check out our selection of e-books!

Sew On, Sew Well, Sew Beautiful,
Cyndi and Amelia

Tuesday, July 16, 2013

July Book Blog: Sew Serendipity Skirt Sew-Along - Part 2

Hello, everyone! Shannon here, and I'm back with Week 2 of our July Sew Serendipity Skirt Sew-Along. We are making the "Tailored Skirt" from Kay Whitt's book Sew Serendipity, so if you're just joining me, catch up by first reading last week's post.

This week, now that our supplies are gathered, we're following the layout/cutting and construction instructions on page 42, down through step 4. Generally, I highly recommend tracing off your pattern pieces onto tracing paper so your tissue remains uncut for future use - but in the interest of time (and because I'm making the largest size), I skipped that this time and just used the tissue.


I've got to say, I love that Sew Serendipity is a spiral-bound hardback, so it lays flat; and how convenient is the big pocket in the back for storing your tissue?


I am also loving how few pattern pieces this skirt takes. I like to use a temporary fabric spray adhesive instead of pins (such as Sulky KK2000) when tracing and/or cutting my fabric pattern pieces. I also really like to use a rotary cutter and straight edge anywhere there are long, straight edges on pattern pieces - and on this skirt, that was most of them! So, cutting went very quickly this time around - which is great news to me, because tedious cutting is my least favorite part of sewing.


Moving onto construction! After completing the waistband facing and preparation of folded contrast strips, I had a lot of fun with the pockets. The instructions tell you to do several lines of top- and edge-stitching along the top seam where the contrast hem is, and I chose a golden yellow thread to match the flower details in my main print. I am in love with how they look!


Contrast stitching also goes down along the vertical seamlines of the skirt. This is a time where I really appreciate having different machine feet to which I can turn. I have been using the sewing room at our office, where I like to use a Viking machine, and the feet easily pop in and out of a little grip. (In my home craft room, I have a Bernina - and the feet are equally as easy to snap in and out, using a little lever.) We contemporary sewers are so lucky for little conveniences like these! In these few steps along, I've been switching out between a regular foot, a 1/4-inch foot and a center guide blade foot. Of course, you can sew with a regular foot only - but being able to rely on these different feet reassures me that my sewing is more accurate than it would be otherwise. 


So, here I am with all of my skirt panels prepared and ready to be stitched together. This has been the most work-intensive of all weeks, and is where you should be at the end of construction step 4. Next week will be much lighter, as we continue with construction of the skirt, adding the zipper and and attaching the waistband facings (steps 5 and 6).


Are you sewing along with me? Be sure to share how your project is coming along in the comments! 

Happy Sewing,
Shannon

Monday, September 24, 2012

A closer look at Stitch Craft Create!


Magazine Week!

This week we delve into the world of magazines, including Stitch Craft Create, Sew Beautiful, and Stitch.
Today we will highlight


Stitch Craft Create is a refreshing magazine devoted to celebrating a creative lifestyle. Through inspiration, motivation, crafting ideas and how-to projects, Stitch Craft Create offers a “can-do” approach to developing creative ambition and handmade originality. Within the pages of this contemporary crafts publication, readers have the opportunity to meet inspiring people, both hobbyists to celebrity designers; learn crafting techniques and receive an abundance of unique project tutorials in a variety of crafting genres, including sewing, paper crafts, fibers, mixed media, repurposing ideas, entertaining and more; discover new must-have products and resources; and above all, ignite the creative passion within themselves! We all wish we had the ability to beautify our lives with creative touches; Stitch Craft Create inspires the creative process and promotes living a handmade life by teaching readers how to seek, find and express creativity.

We had a chance to sit down with Shannon Miller, editor for Stitch Craft Create.  


Sew Beautiful:  Where did your love of crafting come from and have you crafted all of your life?

Shannon Miller:  I have been a crafter for as long as I can remember. Growing up, my parents were always incredibly encouraging of creative play, and there was never a shortage of art supplies, crayons or glue at our house. My fondest childhood memories are of "making things" to play with or give to others. Just the other day, my sister and I were digging through our old dollhouse furniture, and there was a scrappy decoupaged box I clearly remember making, along with wonky furniture I'd crafted from floral foam and fabric scraps (not my finest work, but wonderful memories!) As I grew up, crafting and creativity remained a central part of my identity. My parents gave me my first sewing machine when I went off to college, and today most of what I make is still for our home or family. I strongly considered attending a graduate school for art therapy because of my deeply-held belief that creating things with your own two hands is one of the finest forms of stress relief; and my husband knows that one of the best things he can offer me when I'm feeling anxious is a couple of hours alone in my craft room!

SB: What is the most rewarding part of your job as the editor of Stitch Craft Create magazine?

SM: Knowing that the product we create is how people choose spend their extra cash and leisure time is an intrinsic reward like no other. Craft time is my happy place, and being part of a company that helps foster the creative spirit and enjoyment of others is so endlessly fun for me. You know that feeling when you meet a new person and discover that you're both "into crafts," causing you to squeal with excitement at your newfound shared interest? That's how I feel every day, and I feel like our readers are my best friends for that very reason!

SB: What is the hardest part or most challenging part of your job?

SM: Trying (and failing) to make everybody happy all the time can be very intimidating, and it makes me very sad any time I find out that someone is disappointed, no matter what the reason. And of course, the deadlines are relentless! But all we can do is our best, and keep trying to make that best even better. I'm blessed to work with a team that is so very passionate about what we do. Creating each issue of SCC has been a real learning process, and we're so excited about what's to come in the future.

SB: Since you work with a multicraft publication, can you tell us which medium is your favorite?

SM: Oh my, I love it ALL! How can I choose just one? Personally, I'm a hand embroidery junkie. I also love quilting, although I always tend to bite off more than I can chew when it comes to quilts, so small sewing projects are often my craft of choice. I love sewing for my children and for our house, and I'm getting into clothing as well. I also have a soft spot for any project that crosses mediums, like stitching on paper, or ribbons and buttons on a scrapbook page, and any kind of repurposing/upcycling projects. Events and entertaining are another place I tend to dump lots of ideas; I love getting to make everything coordinate (I get a little obsessive!) Although, the parties I help decorate or host tend to always be a last-minute production, so they're always more incredible in my head than in real life. ;)

SB: Since you just had a baby recently and are now the mother of two very little ones, does your job and home responsibilities allow for any personal craft time? How do you get your "craft fix?"

SM: Two babies under 18 months old has certainly put a cramp in my "free time," but things are settling down now that the newborn is not so new. I can usually grab a few minutes to myself on the weekends or after bedtime. I've gotten into scrapbooking this year, because I love that I can buy and play with all the scrumptious products and tidbits to my heart's desire, yet whip out a complete page in one sitting if I want. It's great stress relief; I like that it allows me to embrace that Instagram-esque concept of capturing a moment and savoring a memory of even small things. And of course, I'm incredibly lucky to work in and around crafts at work, so that certainly helps fill the creative gap when I don't have time for myself at home.

Thank you to Shannon for taking time from her very busy days to allow us to get to know her a little better; the brains behind the creativity!


Have you missed a past issue?  
Did you know you can purchase them at Martha Pullen's online store?

Enter to win a bundle of all our issues, INCLUDING the soon-to-be-released
Holiday Issue!


Enter to win the bundle HERE!
___________________________

There are also many projects in our new book, 101 Ways to Stitch Craft Create! This fun book features all-new projects includes sewing, stitching, embroidery, quilting, applique, knitting, crochet, papercraft, beading and cade decorating so you can unleash the crafter in you!

101 Ways to Stitch Craft Create:
Quick & Easy Projects to Stitch, Sew, Knit, Bead & Fold


Want to try your hand at making gorgeous homemade goodies? This stunning collection of fresh, new projects includes ideas for sewing, stitching, embroidery, quilting, applique, beading, crochet, knitting, papercraft and cake decorating to help you jumpstart your creativity.

In this fully illustrated 128-page book, you’ll find complete instructions and materials lists for 101 original projects, including:
  • ·      Elegant mini cakes
  • ·      Lovely crocheted flower coasters
  • ·      Exquisite shabby chic gift bags
  • ·      Charming machine-stitched egg cosies
  • ·      And much more!


Each simple step-by-step project can be crafted quickly with easily obtainable materials, so you’ll be creating handmade gifts and accessories in no time!

Click HERE to win a copy!

OR purchase it right now for 19% off the cover price...
Our gift to you during National Sewing Month.


Retail: $23.99
Your price: $19.33
You save: $4.66 (19%)