Showing posts with label Sew Serendipity. Show all posts

Tuesday, July 30, 2013

July Book Blog: Sew Serendipity Skirt Sew-Along - Part 4

Hello, everyone! Welcome to the finale Week 4 of our July Sew Serendipity Skirt Sew-Along. We have been making the "Tailored Skirt" from Kay Whitt's book Sew Serendipity, so if you're just joining me, catch up by first reading Part 1, Part 2 and Part 3.


This week, all that was left was to finish up by adding the bottom hem on the skirt. It was super simple - a nice, relaxing time at the machine after 2 more intensive weeks of construction!


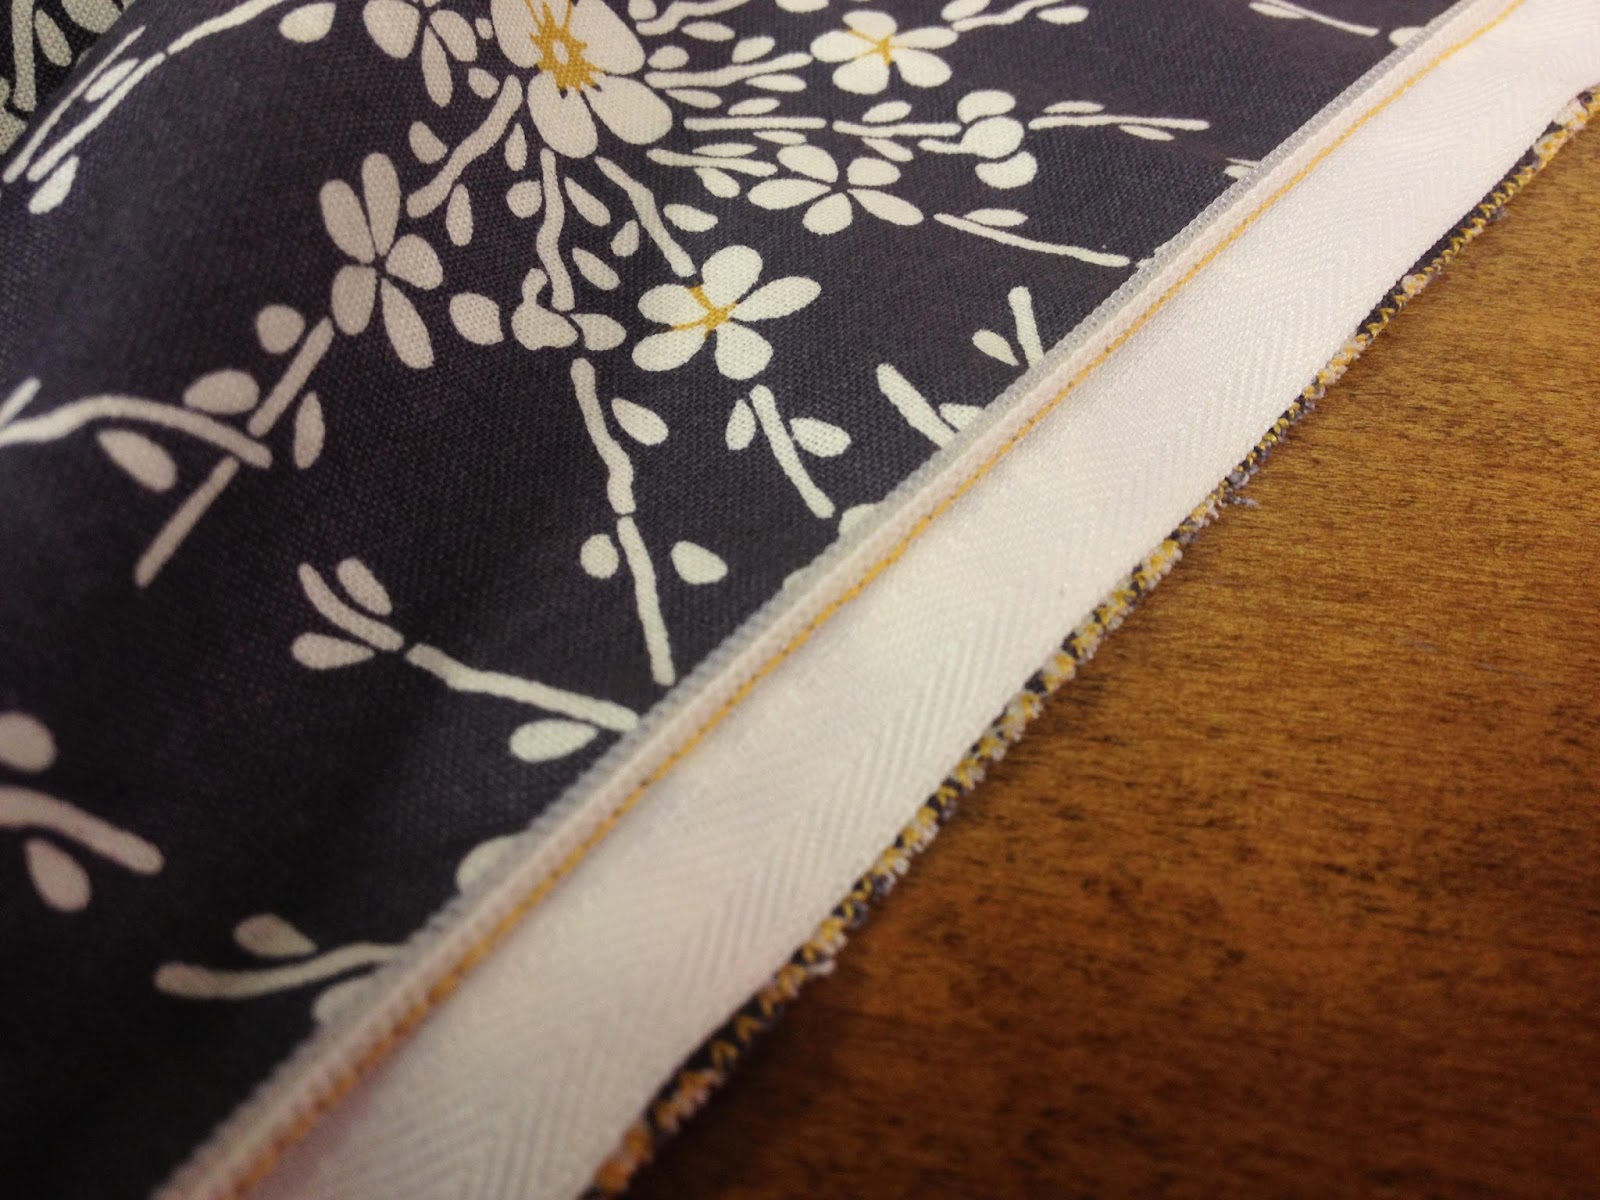
Again, I really love that I chose this golden yellow for my contrast stitching. It pops on top of the prints and really accents the seams. I am a little annoyed that my machine did some funky stitching on my very top line, but it's so minor you can't really tell - especially when worn.


Don't you love how a finished garment feels once all the details are in place? Here is my finished skirt pinned onto a mannequin - I had to draw it in quite a bit in the back to pin it, since the mannequin is skinny and I am, well, not. ;) I'll try to get a photo of myself in it soon and come back to update for you all.


I hope you had a great time sewing along with me! Be sure to share your finished skirts or adaptation ideas in the comments.

Tuesday, July 23, 2013

July Book Blog: Sew Serendipity Skirt Sew-Along - Part 3

Hello, everyone! Shannon again, back with Week 3 of our July Sew Serendipity Skirt Sew-Along. We are making the "Tailored Skirt" from Kay Whitt's book Sew Serendipity, so if you're just joining me, catch up by first reading Part 1 and Part 2.


When we left off last week, I had prepared my skirt panels, pockets and facings and was ready to stitch the skirt front and back together. Today, we'll complete steps 4 and 5 of the skirt construction - which seems simple enough, but this also includes referring to other parts of the book for "general construction" instructions on inserting the invisible zipper and adding the facings. Above, you can see where my front piece and two back pieces are all constructed, ready for my zipper!


To be perfectly honest, I have never inserted an invisible zipper before - but it actually went very smoothly! The zipper foot on the Viking machine I'm using made it really simple.


Here I am proudly showing off how neatly my zipper went in. ;-) I really did surprise myself - and will definitely not be shying away from invisible zippers anymore!


Once I got the zipper in, it was quick to finish up the top hem by applying the facings, understitching and then top- and edgestitching.


And that's it for this week! Are you sewing along with me? I would love to see what you're creating. Be sure to share in the comments, and join me again next week for the fourth and final installment of our sew-along. I'll be completing the skirt with a hem band and showing off the finished product!

Tuesday, July 16, 2013

July Book Blog: Sew Serendipity Skirt Sew-Along - Part 2

Hello, everyone! Shannon here, and I'm back with Week 2 of our July Sew Serendipity Skirt Sew-Along. We are making the "Tailored Skirt" from Kay Whitt's book Sew Serendipity, so if you're just joining me, catch up by first reading last week's post.

This week, now that our supplies are gathered, we're following the layout/cutting and construction instructions on page 42, down through step 4. Generally, I highly recommend tracing off your pattern pieces onto tracing paper so your tissue remains uncut for future use - but in the interest of time (and because I'm making the largest size), I skipped that this time and just used the tissue.


I've got to say, I love that Sew Serendipity is a spiral-bound hardback, so it lays flat; and how convenient is the big pocket in the back for storing your tissue?


I am also loving how few pattern pieces this skirt takes. I like to use a temporary fabric spray adhesive instead of pins (such as Sulky KK2000) when tracing and/or cutting my fabric pattern pieces. I also really like to use a rotary cutter and straight edge anywhere there are long, straight edges on pattern pieces - and on this skirt, that was most of them! So, cutting went very quickly this time around - which is great news to me, because tedious cutting is my least favorite part of sewing.


Moving onto construction! After completing the waistband facing and preparation of folded contrast strips, I had a lot of fun with the pockets. The instructions tell you to do several lines of top- and edge-stitching along the top seam where the contrast hem is, and I chose a golden yellow thread to match the flower details in my main print. I am in love with how they look!


Contrast stitching also goes down along the vertical seamlines of the skirt. This is a time where I really appreciate having different machine feet to which I can turn. I have been using the sewing room at our office, where I like to use a Viking machine, and the feet easily pop in and out of a little grip. (In my home craft room, I have a Bernina - and the feet are equally as easy to snap in and out, using a little lever.) We contemporary sewers are so lucky for little conveniences like these! In these few steps along, I've been switching out between a regular foot, a 1/4-inch foot and a center guide blade foot. Of course, you can sew with a regular foot only - but being able to rely on these different feet reassures me that my sewing is more accurate than it would be otherwise. 


So, here I am with all of my skirt panels prepared and ready to be stitched together. This has been the most work-intensive of all weeks, and is where you should be at the end of construction step 4. Next week will be much lighter, as we continue with construction of the skirt, adding the zipper and and attaching the waistband facings (steps 5 and 6).


Are you sewing along with me? Be sure to share how your project is coming along in the comments! 

Happy Sewing,
Shannon

Tuesday, July 9, 2013

July Book Blog: Sew Serendipity Skirt Sew-Along!


Hello, sewing friends! Shannon here, and welcome to our July book blog on Sew Serendipity: Fresh + Pretty Designs to Make and Wear by Kay Whitt. I have been wanting to make something from this book since it first came out, but it just hasn't happened yet; so, join me in a sew-along over the next few weeks as we make a Tailored Skirt (below)!


With the ease of all of Kay's patterns, this is a great project for beginners -  not to mention a perfect summertime skirt to spruce up your wardrobe for the last few hot months ahead. So gather a copy of Sew Serendipity and all of your materials, and let's get started.


Before we start, you'll definitely want to take your measurements (Kay provides great guidelines for this in the front matter of Sew Serendipity) so that you know what size to make. I also highly recommend pre-washing your fabrics. If you want, you can make a muslin to practice the techniques and adjust the fit to your liking - but I'll be skipping this step.


I have selected a couple coordinating fabrics from Anna Griffin's gorgeous Honoka line. I've been dying to use the lacy Japanese Blossom print, and this will be the perfect project to showcase it. For now, trace off your pattern pieces and cut everything out.

Next Tuesday, on July 16, we'll dig into construction by preparing the waistline facings, creating the pockets and stitching the skirt panels together (steps 1-4). On July 23, we will finish piecing the skirt body and add the zipper. Then on July 30, we'll wrap things up by finishing off the hem band.

I can't wait to get sewing with you. Please be sure to share your progress in the comments as we go along, and join me for the next three Tuesdays to see how my own skirt is coming together!

Shannon Miller
Senior Editor, Sew Beautiful

Thursday, September 20, 2012

Video with Kay & Tilda Kit Giveaway!


A couple of years ago, when Sew Serendipity was still brand new, Kay Whitt sat down and did a 2-part series with Nancy Zieman on "Sewing with Nancy!"

Kay talks about the book & the designs inside:


A TILDA Giveaway!!

Tilda Lunch Bucket Bag Sewing Kit

When you were a kid, it was the metal box or the brown paper sack. Now, it’s the grocery store’s plastic bag you took it home in. Your lunch deserves better! Transport it in style with the fruits of this kit - the Tilda Lunch Bucket Bag Sewing Kit.

You’ll make your co-workers jealous when they see your fashion-forward lunch bucket bag, created with ease using the kit instructions and charming Tilda fabrics. But the lunch bucket bag doesn’t just let you carry your nosh fashionably - the sturdy handle hardware and drawstring closure design make transporting food without spillage a breeze.

Not only fit for carrying your lunch to the office, this bag is the perfect vessel for bringing snacks to the park, or for your granddaughter to take her lunch to school in. You could even use it as a casual summer handbag – no lunch required!

This kit includes:

• Lunch Bucket Bag CraftAble by Kay Whitt, excerpted from her book Sew Serendipity Bags
• Tilda - Molly "Fruit Garden" 100% cotton fabric for bag exterior & handle (Fabric A)  - 5/8 yard 
• Tilda – “Christmas House" 100% cotton fabric for lining, binding & drawstring (Fabric B) - 5/8 yard 
• Tilda - Tammie "Fruit Garden" 100% cotton fabric for top of bag (Fabric C) - 1/2 yd 
• Peltex 71 Fusible Stabilizer - 3/4 yard
• Pellon Fusible Interfacing - 1 yard
• 2 x 1-1/4" rings for handles
Finished dimensions of bag
10” (counting the drawstring unit) x 7” (25.5 cm x 18 cm), without the handle
The handle has an 8” (20.5 cm) drop

Go HERE to enter to win yours!  

OR..
Just go get your own copy!  It is on sale at our store!

Retail: $47.19
Your price: $37.57
You save: $9.62 (20%)


Wednesday, September 19, 2012

Kay Whitt's Boutique Chic! + giveaway


From our spotlight on Kay Whitt last fall, in issue #138:


Kay Whitt has used patterns for most of her life and is well aware of the aggravation that can come with them, not the least of which is vague, confusing instructions.  So for her Boutique Chic line at Serendipity Studio, the bottom line is "user-friendly."  Kay's genius with fabric and fresh, contemporary designs will inspire you to turn her solid, simple lines into really great go-to clothes.  Here's a look at her take on fall.


"Torii Tunic" in Odyssea by Moda fabrics coupled with purchased leggings.
(Left) "Kendra Skirt" (#66) in brown linen with felt flower embellishments.  (Right) "Bella Skirt" (#85) in Moda wool with wool appliquéd accents.  Tops are purchased.


"Sophia Trench Coat" (#99) in heavyweight twill from Anna Marie Horner's Drawing Room collection (no longer in print).


"Catherine Coat" (#100) in jacquard fabric (actually home dec!) with purchased skirt.
"Francesca Skirt" (#95) in several City Girl prints by Benartex fabrics with knit purchased top and sweater.


"Samantha Skirt" (#67) in orange linen with black ribbon and felt flower embellishment coupled with a purchased sweater.

Note: As these pieces are Serendipity samples, the fabrics are not current.  We have listed them so you know the manufacturers who may have similar fabrics in stock.  Also, in some cases, cuts of discontinued fabrics may be found through online sources.

Visit our online store at store.marthapullen.com and shop the whole Boutique Chic line of patterns and Serendipity books.

And don't forget :: Save an additional 10% by entering code MPSEWMONTH12 during checkout!


TODAY'S GIVEAWAY!


Creativity for Kids® expands its Sew Cute product line to include three, brand new Sew Cute sock animals. In February, at the annual American International Toy Fair, Creativity for Kids introduced Poppy the Sew Cute Sock Puppy. The Parents’ Choice Awards recognized the craft kit as a 2012 Fun Stuff Award winner. 


The three new sock animals are: 

Sidney the Sew Cute Sockisaurus and 


Argyle the Sew Cute Sock Owl!

With a few snips and simple stitches, children can create the sock animals. Each kit includes a pair of patterned, cotton socks; scissors; felt accents; buttons; ribbon; a charm; fiberfill and all the sewing essentials needed to complete the craft kit. The Sew Cute kits are for children seven years and older and are great for collecting.


Enter HERE to win one of the above adorable Sew Cute animals!


Tuesday, September 18, 2012

Sew Serendipity Bags tutorial + Giveaway!


Have you made a Sew Serendipity Bag?


A Bag for Every Skill-Level, Every Occasion, Every Style
Kay Whitt loves designing bags, and you're going to love sewing them!

Take Your Pick of Styles:

With full instructions for twelve bags—and with a few clever variations thrown in—there are plenty of designs to choose from! Pick a handbag that is sweet, sleek or funky. Or check out some of the other great designs: a flirty little backpack, the perfect lunch bag, convenient shopping bags and handy task-oriented bags (whether that task involves a laptop, gym clothes or diapers). Each design is easy to adapt to your style.


Hone Your Skills:
Check out the technique section, which includes step-by-step photos, to freshen up your skills and learn about a few new notions, too. Next, move on to the projects to put your know-how in motion.
  • Flip to the Simple Bags for something quick and fun to sew. And even though these bags are easy to make, the end results are clever and cute.
  • Step it up in the Intermediate Bags section, with bags that play up your style. Learn a few new skills, try out a few new tools and make yourself a bag you can really show off.
  • The Challenging Bags section takes you to the level of bag maven. The bags' construction may be complex, but the instructions are not. Sew it together step by step, and find yourself with a truly professional, beautifully constructed bag.
The bags in this book are truly extraordinary—and with Kay's instruction, they are oh-so-easy to make.

Includes 6 Pull-Out Pattern Sheets!


Below are some excerpts for you from Sew Serendipity Bags!  Kay shows how to make handles, how to install a double loop slider, and how to install grommets!  

Read on...


Making Handles
Many of the handles for the projects are made in the same manner. Be sure to piece the strips together as instructed per project to ensure the proper length as well as width. Once the strips have been cut, pieced and interfaced on the wrong side of fabric, follow the steps below to create the handles.
1
Place two strips right sides together and stitch down one of the long sides with a 1⁄2"seam allowance. Press the seam open.


2
Fold in one of the outer raw edges so that it just touches the raw edge of the seam allowance and press.


3
Repeat for the other outer raw edge.


4
Fold the handle strip in half along the seam, with wrong sides together, and press.


5
Edgestitch down the long open side of the handle, then down the long finished edge. To edgestitch, begin at one end and follow the finished edge all the way around a piece. I like to stay within 1⁄16" to 1⁄8" away from the edge for this stitching.

6
Topstitch each side. To topstitch, begin again at the same end where the edgestitching started, only this time, complete the stitching approximately 1⁄4" in from the previous stitching line. Notice how I use the outer edge of my machine foot to gauge the distance evenly all the way around the piece.
Repeat for any remaining handle strips, then trim the handles down to the length specified in the instructions.


Pivoting
When edgestitching or topstitching handles, I like to pivot the piece and stitch across the end. Pivoting at the end of the handle saves time and means that there will be fewer threads to trim later.


1 When you are within 1⁄8" of the edge, stop with the needle firmly in the fabric. Lift the presser foot, and rotate the fabric.

2 Drop the presser foot, and continue sewing.


Installing a Double Loop Slider
Installation of a double loop slider enables the handle to be adjustable. This is particularly handy on the Cross-Body and Convertible Backpack projects. This is a simple installation once you know how to do it.

1 Feed the handle end through the slider.

 2 
Put the end of the handle through the D-ring or swivel clasp, whichever applies to the project.

3
Pull up some slack in the handle portion that feeds through the slider. Slip the end of this handle under the slack, and next to the middle bar of the slider.
4
Feed the end over the middle bar, keeping it under the slack.


5
Fold over the end of the handle 1⁄2" and place that end as close as possible to the slider while still being able to machine-stitch to secure it.

6
Stitch across the handle end. Repeat for added durability.


Installing Grommets
Grommets (or eyelets) allow for a finished-edge hole to be put into a bag. These are used for the media pockets on the Laptop Messenger, Convertible Backpack and Multi-Tasker Bag.

Tools needed:

1
To install a grommet, place the front portion onto the piece, following the placement in the project instructions. Use a temporary marking pencil to trace the inside of the circle.

 2 Start the opening with an awl.


3
Enlarge the opening with a sharp pair of scissors.


4
Place the front portion of the grommet in the opening with the back portion on the 
other side of the piece.


5
Use grommet pliers to attach the pieces around each other and secure to both sides of the fabric. 


Now, would you like to WIN your own copy of 
Sew Serendipity Bags??

Click HERE for the entry form!

And for those who don't want to wait, order your own copy!  HERE, at the Martha Pullen Store, we have it on discount, just for you, our blog readers:

Retail: $29.99
Your price: $19.79
You save: $10.20 (34%)

(Plus, save an additional 10% by entering code: MPSEWMONTH12 upon checkout!!)